Showing posts with label beginner. Show all posts

Tuesday, 8 April 2014

Going HDR!


I'm a kind of person who cannot sit idle even for a minute and the worst part is that I have got nothing to do during my vacations. I had to do something to strike off my boredom. But how? That was one thought I had in my mind for the last few days. The best one out of the thousands of ideas I had in mind was to learn Photoshop CS6. I know a bit of basics,  that I learnt during my last vacations but wanted to try professional editing. 
So, I gave it a shot!

I have heard a lot on HDR (High-dynamic-range imaging), maybe on the web, maybe on some of the photography magazines or other sources. Moreover, the HDR Images on 500px fantasized me, they were remarkable.  I had to learn this one! And the best part of HDR, is the way it transforms the sky in the frame.

According to me, HDR best suits on photos of the categories - nature, landscape, architecture. So, I picked this photo. You can check out the original version of it, here. So, I went to YouTube, and searched for videos containing Photoshop HDR Effect Tutorial, and I ended up watching the below video. 


That's how I learnt the HDR effect! It was fun learning HDR. This tutorial was a bit simple one. There's some more professional and complicated ones. Need to go through those as well to master HDR and I have lots of time trying it out. That's all in this post folks, but I will be up with some more of my Adobe Photoshop CS6 edits! Till then, bye!


Sunday, 12 January 2014

Beginners' Guide: Buying a Camera Kit


One of my blog readers asked me what's the best kit for a beginner. As a beginner, we all have that question in our minds. So, I am going to give you a guide on 'Buying a camera kit' and I will also show you what an ideal kit would consist of. 

There's a lot of things to look at before you invest money on a kit. A beginners' kit must be simple and of course the investment should be small. According to me, a beginners' kit must comprise of a SLR, 2 or more lenses, a tripod and a kit bag. Moreover, a beginner must invest in a cheap SLR and invest more in accessories. Now, let me consider myself in place of a beginner and I have about Rs 50,000 ($ 813) in my pocket. And I'm going to invest this in buying a kit for photography. Then, my kit would comprise of the following items:

1. Camera: Canon EOS 600D (Body only)


Source: Flipkart


Canon EOS 600D is one of the best entry level DSLR and I think it is one of the best budget DSLR for a beginner. The 600D is powered by an 18 megapixel CMOS sensor. Other key features of the camera is ISO 100-6400, expandable upto 12800, 9 AF points, Built in flash, HD video recording. These make the Canon EOS 600D a must buy camera for beginners. I have chose this camera after considering some facts, reviews, and more. You can also check out these cameras:

  • Nikon D3200
  • Nikon D5200
  • Canon 1100D
  • Sony Alpha A57

2. Lens 1: Tamron AF 18-200 mm F/3.5-6.3 XR Di-II LD Aspherical (IF) Macro


Source: Flipkart


As a beginner, you need to have a zoom lens in your kit. I prefer the Tamron 18-200mm because it has a focal length from 18 to 200 mm. It even has a macro switch which will able you to shoot macro with this lens. This lens can be used for shooting portraits, landscapes, birds and animals, macro and more. I have chose this lens over the kit lenses like 18-55 mm or 18-135 mm because of its focal length and also for the fact that it costs about Rs 13,000. 

3. Lens 2: Canon EF 50 mm f/1.8 II lens


Source: Flipkart


I feel every beginner must have a prime lens in their kit. Prime lens are unlike zoom lenses as they have a fixed focal range i.e., you cannot zoom in and zoom out using this lens. You may be wondering, why this lens then? Let me tell you. Prime lens provide great image quality, wider aperture and better aperture compared to zoom lens. As you are not able to zoom in and out using this lens, you need to get close to your subject. This makes you think before you click. Eventually, this will help you develop your photography skills. The 50 mm is one of the basic prime lens and it costs around Rs 6000. You can shoot portrait, landscape, macro and more with this lens. Other prime lens for 600D:
  • Canon EF 40 mm f/2.8 

4.  Tripod: Benro T-600EX


Source: Flipkart


According to me, tripods are a must in a beginners' kit. Tripods not only help you in shooting landscapes, waterfalls, lights, fast moving objects, star trails etc but also helps you to work with different exposures. With tripods you can make exciting images. Tripods makes understanding exposures easier. The Benro T-600EX costs about Rs 1500.

5. Camera bag: DigiFlip Wizard CB001 


Source: Flipkart


A photographer is always in move. So you need to have a suitable camera bag to hold your camera and its accessories. There are different camera bags in the market, but I have chose this considering the items I have. The DigiFlip Wizard camera bag cost around Rs 1ooo

This how I would make use of my budget to buy a beginners' kit. You can even invest in other accessories like UV filters, flash etc. Don't make the wrong move by investing most of your budget on the camera body and least on the accessories like lens. Choose your items wisely. Be patient. Take time, make a research on the items you are interested. Check out the reviews online and do check out the sample images. That's all I have to tell in this post. If you anything more to ask me, do comment below. Thanks for reading. 

Follow my blog with Bloglovin

Sunday, 5 January 2014

Landscapes at the Beach


Beaches are an exciting place to photograph landscapes. These are some images taken by me at a beach in Singapore. And there's more! I will tell you 3 tips for shooting better landscapes! So let's get things started.

I haven't seen islands so close to the beach as in the first photograph. And there was a way to those islands from the beach. Of-course, there was water all over the place, making it a perfect landscape. But wait! There was something missing. I had read in one of the photography magazines that landscapes look wonderful when you show human impact. So, I waited for the right moment. Eventually, I saw this couple walking along the beach. By adding them into this landscape, I made a better landscape.


As I spent time in the beach, it turned dark. The sun was about to set and I found this wonderful scene. With the trees in the lower part of the scene and blue sky dominating the rest of the scene. Moreover, there was the sun ready to say bye in the middle of the scene. I increased the shutter-speed, widened the aperture and set a low ISO to click this image. The reason why I did that was, I wanted a silhouette. 


I have done some serious works on landscape photography and I have also made good research on 'How to photograph landscapes?' and more. So, I will let you know some landscape photography tips that will help you shoot better landscapes. 


  • Go wide! Unlike other photographs, in landscapes you are not focusing on a particular subject. You are showing equal importance to the whole frame. So, you must take the photograph in such a way that the whole part of the frame is in focus. This can be achieved by setting the camera to a large f-stop number i.e., you are widening the aperture. 
  • Next up, is making use of a tripod. Tripods can be very useful while shooting landscapes. By using a tripod, you can work with wide range of shutter-speeds. You can even get sharper photographs by following this method. You can even buy a new lens for landscape photography.
  • And for the final tip. Switch your camera to landscape mode. By this, the camera will provide you with the best settings for getting the best landscape. Once you are an expert, switch to manual. Do look for landscape photography ideas online.

    I hope you liked the photographs and the tips as well. Do check out other posts on this blog. Have anything to tell me? Then, do comment below or send me an email! More in the next post. Till then, bye!

Wednesday, 25 December 2013

How to make a photo collage?


It's the period of social networking and people these days love uploading their photos on the web. Out of these most of them tend to add filters to their photos or make a collage. Daily, hundreds and thousands of photo collages are being uploaded. And for those who still don't know an appropriate way to make one, you are in the right place! In this blog post I will be clearly explaining the steps in making an 'exciting' collage. So, put on your seat belts and get ready for some serious job.

There are lot of photo editors or photo editing softwares that can help you make a collage. But, here I will be mainly dealing with Picmonkey, as I find it a very simple and free way to edit photos online. Moreover editing photos on softwares like Adobe Photoshop can be cumbersome. So I feel by choosing Picmonkey can make it simpler, faster, and easier. Now, lets look at the steps.

Step 1: Go to picmonkey.com. Once you are on the home page, you can find 3 options on the top of the site: 'Edit a photo', 'Create a collage' and 'Design'. Click on the 'Create a collage' button.

Step 1

Step 2: Once you finish step one, you will find yourself in the window similar to the one below. All you need to do is upload the photos(which you want to make a collage of) to Picmonkey Editor. You will see an option, 'Open photos' on the right top side of the window. Click on that option and upload the required photos. 


Step 2


Step 3: Then, you need to drag the uploaded photos to the center of the editor(on the blank collage). Later, you need to select a layout for your collage. By choosing a layout, you can decide how you want your photos in the collage to be arranged. Picmonkey offers users a wide range of layouts, though some are for Royal users.


Step 3


Step 4: This step is all about adding swatches. This step is optional. If you are interested, then this is what you need to know. Swatches are just designed backgrounds which can be used to fill the gaps in the collage. Swatches can be applied the same way as you put the photos on the collage, just drag it!


Step 4

Step 5: And coming to the final step. Here you can edit the background, maybe change the colour of it or just deal with spacing. Once you are done with this you can either edit the collage with Picmonkey Editor or just save the file. That's all. You will have your collage done and ready to be uploaded!


Step 5

Below you can see a collage that I made for this blog post. As I told before, you can add filters, crop, add text, and more on the collage by opening it on the Picmonkey Editor. Hope you liked this post and do comment below, if have anything to tell me. More in the next post.

Result!

Friday, 22 November 2013

Instagram Update


Taddaaa!! I'm back. This time I thought of showing you some of my photographs from Instagram. My card reader isn't working and I am unable to upload the photographs on my SLR. So I thought I will update my blog with my Instagram updates until I get a new card reader. So you have it, my new post 'Instagram Update'!


Instagram has been so popular now that millions of people post thousands of photos daily on this online photo-sharing network. Not only photographers, but common people too love using this wonderful app. After Facebook bought Instagram on April 2012, things have changed. It's now available to a wide range of users as it is now available on iOS, Android and Windows devices too. 

I love uploading my photographs on Instagram. Found an awesome subject? Take out your mobile, open Instagram, click.. click and click. Then add a filter and Share! Done. That's all you need to do and it cannot get simpler than this. Some of the filters available on the app are X Pro II, Toaster, Inkwell, Walden, Hefe, Nashville, etc. Instagram keeps bringing out new filters with every app update. That's what I love about the app. Now, you can even upload and edit short videos! Sharing has been fantastic in this app. Select where you want to share. Maybe it's Twitter or Facebook or Tumblr or any other social networking site, a tap can share your Instgram images on these platforms. 

Here are some of my latest images on Instagram. Hope you like them! So what are you waiting for? Download the Instgram app on your smartphone and start clicking some amazing snaps. Don't forget to follow ME on Instagram. More in the next post, till then Adios!

Instagram


Monday, 3 June 2013

5 Reasons why you must have a Tripod!


Hey there! Nowadays, I don't find time updating my blog. I have hundreds of photos that I can post but no time! Busy indeed. I am very happy that today I could post something. I really wanted to post something different this week. Here it is, my new post 5 Reasons why you must have a Tripod.

''Why do people use tripod for photography?'' This was one question I really had in my mnd for months. I was fascinated to buy one soon after I knew the reason. Actually, tripods can be very very very useful while taking pictures. From a hobbyist to a professional photographer, it can be useful for any kind of photographer you are. Okay, below are the 5 reasons you should have one.


  1. If you are new to photography, make sure you buy a tripod along with a DSLR. When you are using an SLR for the first time, you may not get proper images. Sometimes, images look blurred out. This is because of camera shake. And you will get rid of this once you are comfortable with your camera which may take a long period. So, till you get comfortable you can buy a tripod, which be a good companion.
  2. If you are a landscape photography enthusiast, you really need one. While capturing better pictures of landscapes you need to switch your camera to a slower shutter-speed. The reason why a slow shutter speed is used is that, this will cause wonderful effects. Sometimes the sky looks like heaven and your landscapes will be filled with the right amount of light. Although, when you have no tripods, this will result in camera shake. This may also apply when you are doing waterfall photography.
  3. Tripods can even mean a lot when you are doing sport photography which includes pictures of fast moving objects. The lens used for this purpose may seem a bit difficult to be hand-held. So, tripod is a good option. Moreover, it also allows you to your preferential shutter-speed.
  4. Many people have a wrong notion that tripods are a bit problematic when you are carrying it to different places. But that's wrong. Actually you can fold your tripod and keep it in a bag. A school bag or laptop bag can also be used for this purpose. That means, tripods are handy.
  5. Tripods are not only used to balance your cameras. It can even act as a flash light holder an more. That's why you will find tripods in studios. Actually they are very useful for a photographer!

Wednesday, 13 February 2013

Beginners' Guide: Buying a Camera


If you are a beginner in photography and ready to buy a camera, then you are in the right place! Here, are some of the cameras which are very well suited for beginners. There is sufficient information about the camera you need to know. Only thing is choose the one which suits you the best..

One common mistake people do while buying their first camera is that they buy a professional and costly one. Instead of doing this, the person can invest money for a cheap SLR and a costly lens. Lens matters more than a camera! Take a look at some of the below cameras and their reviews.


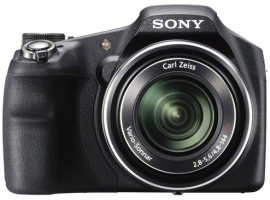
1. Sony Cyber-shot DSC-HX200V

This camera is not a DSLR, but this compact camera has been outstanding in its performance. If you are new to photography and  usually take photos of distant objects(eg. bird photography), then this is the right choice. It's pictures are decent and Sony offers its best services.

Source: sony.co.in

 Key Features:
  • 18.2 Megapixel
  • 30X Optical Zoom
  • 720p HD Quality Video Recording
  • CMOS Sensor
  • High speed Auto Focus
Price: Rs. 24,990


2. Canon EOS 1100D

This camera has been pretty outstanding in its performance and picture quality. If you are a Canon lover, then its ideal that you buy this camera and invest for a costly lens. This camera has much to offer and it is a Best Buy! 


Source: canon.co.in

Key Features:
  • 12.2 Megapixel 
  • CMOS Sensor
  • ISO 100-3200, expandable to 6400
  • 9-point cross-type AF System
Price: Rs 26,990 ( Body + Kit 18-55mm IS II)


3. Nikon D3200 

This camera too is outstanding in performance with stunning images. If your budget is around Rs. 50,000 then buy this SLR with a 18-105mm VR lens. This combination is ideal for beginners. This is the next version of Nikon D3100, which had amazed many photographers. Nikon has been raising its standards by offering new features like Wi-Fi onto DSLRs.

Source: nikon.co.in

Key Features:
  • 24.2 Megapixel
  • CMOS Sensor
  • ISO 100-6400 
  • 4 frames per second 
Price: Rs. 36,450 ( with AF-S 18-55mm VR lens)


If you are still not satisfied with these cameras then look out for these:
  • Olympus Pen E-P3
  • Olympus Pen E-PM1
  • Olympus Pen E-PL3
  • Canon PowerShot G10
  • Canon 550D
  • Nikon D5200
  • Sony SLT-A37
  • Sony SLT-A55

We will reviewing more cameras soon... Thanks for reading. Let us know if you have comments. Bye!


Follow me on Hubpages!


LinkWithin

Related Posts Plugin for WordPress, Blogger...